
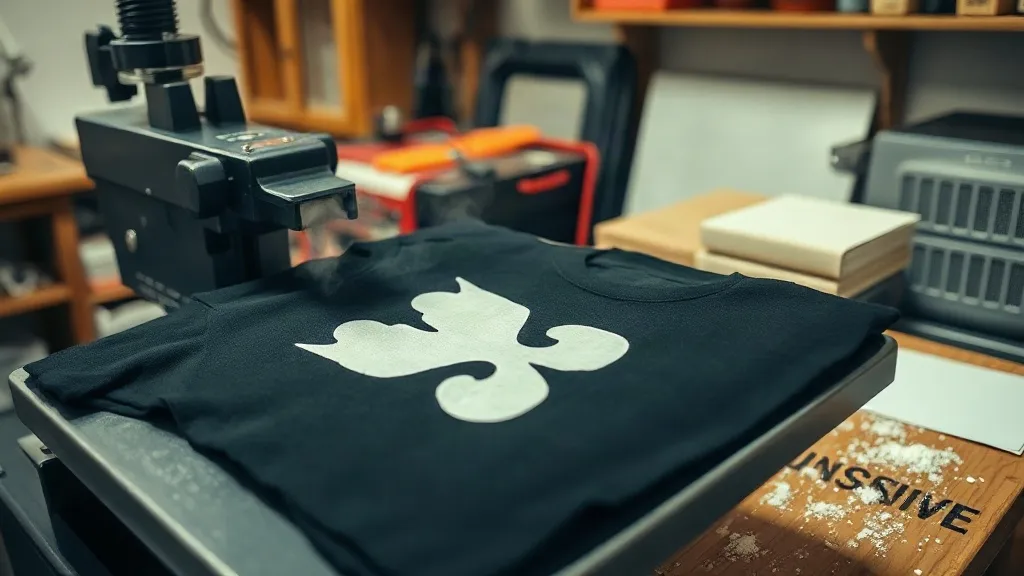
Ask any print shop what went wrong with a rejected order and you will hear about the press, not the printer. The artwork was clean, the film fed straight, and the dtf transfers looked perfect on the table. Then the shirt came back three weeks later with cracked edges and a white halo, and nobody could explain why. In most cases the answer sits in a ninety-second window between the powder station and the peel table. This guide walks through that window step by step, because the final stages of dtf transfers production are where good prints quietly become bad ones.
Why the finishing stage deserves more attention than it gets
Shops tend to obsess over the printer. They tune profiles, swap film brands, and chase ink limits for weeks. That work matters, but it is only half the job. A dtf print is a sandwich of ink, adhesive powder, and fabric, and the bond between those layers is set entirely by heat. Get the temperature right and the print stretches with the shirt for years. Get it wrong and the adhesive never fully melts into the fibers, so the transfer sits on the surface like a sticker until the first wash pulls it loose.
The tricky part is that a failed press often looks fine on day one. The transfer adheres, the edges sit flat, and the customer takes it home happy. The failure only shows up after laundering, which means you have already shipped the problem. That lag between cause and symptom is exactly why the finishing stage needs a written standard rather than a shop-floor habit.
Three variables, one outcome
Every press decision comes down to temperature, pressure, and time, and changing one usually forces a change in the others. A press running cooler needs more dwell time. A thicker garment needs more pressure to level the surface. Rather than memorizing numbers, understand the relationship, then record what works for your specific combination of film, powder, and blank.
Curing the powder correctly
Powder curing is the step most often rushed, and it is also the least forgiving. After the printer lays down the wet design, you sprinkle adhesive powder over the ink and shake off the excess. What happens next decides how the print behaves under stretch.
What proper curing looks like
When the powder melts, the design surface turns from matte and grainy to slightly glossy and uniform. Look closely and you should see the granules collapse into a smooth skin. If you still see individual particles catching the light, the film is undercured and the adhesive will not bond evenly during pressing. If the film starts to curl or the carrier wrinkles, you have crossed into over-curing, and the print will likely feel stiff and crack at the edges.
A few habits make this repeatable:
- Shake the powder evenly rather than dumping it in one spot, then tip the film and tap the back to release the excess.
- Keep the curing temperature consistent across the whole film, especially on large gang sheets where the edges can lag behind the center.
- Let the film cool flat before stacking. Stacking warm sheets traps heat and can cause the carrier to bond to the powder of the sheet below.
- Check humidity in the room. Damp powder clumps and cures unevenly, which shows up later as patchy adhesion.
Setting the press for the garment, not the calendar
There is no universal press setting, and any shop that claims otherwise is either printing one fabric forever or accepting a lot of returns. Cotton, polyester, and blends all conduct heat differently, and a thick hoodie absorbs far more energy than a lightweight tee. The practical approach is to build a small reference chart for the blanks you actually stock.
Pressure matters more than people expect
Light pressure leaves the transfer sitting on top of the weave, which is where peeling starts. Excessive pressure flattens the design, pushes adhesive into the fabric so far that the edges lose definition, and on polyester can create a shine mark around the print. Aim for firm, even contact where the platens close fully without forcing. If you are pressing over seams, zippers, or pockets, use a pressing pad so the pressure distributes evenly instead of concentrating on the high point.
Pre-pressing is not optional
Moisture is the quiet enemy of adhesion. A shirt straight from a poly bag holds enough humidity to interfere with the bond, and the trapped steam shows up as bubbles or a dull, milky finish. A short pre-press removes that moisture and smooths the fibers so the transfer has a flat surface to grab. It costs a few seconds and prevents a category of failures that are almost impossible to fix after the fact.
Peel timing: hot, cold, or somewhere in between
Peel timing is where opinions get loud. Some films release best while still warm, others need to cool completely. The honest answer is that it depends on the carrier film and the powder, and the only reliable method is to test the batch you are working with. What matters is consistency: pick a peel temperature, document it, and apply it to every job using that film.
A few principles hold across most films:
- Peel in one smooth, continuous motion at a low angle rather than yanking upward.
- Peel against the direction of the design's fine detail so thin lines do not stretch.
- If the print starts lifting with the carrier, stop and let it cool further rather than forcing it.
- After peeling, cover the print with a protective sheet and press briefly again to lock the edges.
When customers ask for dtf transfers near me
Walk into any shop that offers local pickup and you will hear the same request: customers want a supplier they can reach quickly, especially when a job needs a reprint the day before an event. If you are sourcing rather than printing in house, ask potential suppliers about their turnaround on reprints and how they handle color matching across orders. A local option is only valuable if it can actually solve a problem fast. Shops that keep a small stock of common designs on hand, and order the rest from a reliable partner, tend to handle rush requests with far less stress than those relying on a single channel.
Building a finishing standard your whole team follows
The difference between a shop that ships consistent work and one that fights fires is documentation. Write down the press temperature, pressure setting, dwell time, and peel temperature for each blank and film combination you use. Tape it to the wall next to the press. When a new employee starts, they follow the sheet instead of guessing, and when a customer complains, you have a baseline to compare against.
It also helps to keep a small test library: press a sample of each new film or powder batch onto an offcut of your most common fabric, label it with the date, and keep it. When something feels off, you can press a fresh sample alongside the old one and see the difference immediately. That habit turns troubleshooting from guesswork into comparison, which is far faster and far less expensive than reprinting an entire order.
Frequently asked questions
How long should I wait before washing a freshly pressed DTF print?
Give it at least twenty-four hours. The adhesive continues to settle into the fabric fibers after pressing, and washing too soon can weaken the bond before it fully sets. For best results, wash inside out in cold water and avoid high heat in the dryer.
Why does my transfer peel at the corners first?
Corners and edges cool faster than the center of the design, so they often receive less effective heat during pressing. Use a pressing pad to level the surface, extend the dwell time slightly, and make sure the edges of the transfer sit fully within the heated platen area.
Can I press a DTF transfer twice if the first attempt looks weak?
Yes, a second short press usually helps if the first bond was incomplete, but only if the print has not already been washed. Repress with a protective sheet over the design to prevent sticking, and keep the second press brief so you do not over-flatten the texture.
Does powder curing affect how the print feels on the shirt?
It does. Over-cured powder creates a thicker, stiffer adhesive layer that feels rigid against the fabric. Properly cured powder melts into a thin, flexible skin, which is why the print moves with the garment instead of sitting on top of it.
What causes a cloudy or milky look on dark garments?
Moisture trapped during pressing is the usual culprit. Pre-press the garment to remove humidity, press on a dry surface, and avoid pressing a transfer that has absorbed moisture from a damp room. Storing film and finished prints in a dry space prevents most of these cases.